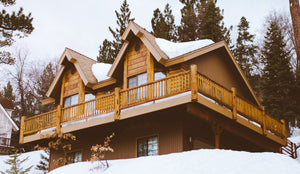
Project Guide: Re-Staining Your Log Home Exterior
What is Stain?
Stain is a liquid product applied with a brush or sprayer that helps protect the exterior wood in a log home from the long-term effects of exposure to sun, rain, and snow. It is also usually tinted with colour to compliment/enhance the wood species colouring, or to make a completely different colour that is desired for the home. Contrasted to paint which hides the wood, stain allows the natural wood grain and colour to remain visible to some extent, depending on the pigment.
Why Re-Stain a Log Home?
Log home owners typically do this because the stain is old and worn, and/or they want to change the stain colour. Re-staining protects your investment and restores the beauty of your log home.
How often do I need to re-stain my log home or cabin?
Log home generally need to be re-stained every 4 to 6 years, depending on the weather. Walls that face to the South and West may require re-staining every 2 to 3 years due to higher exposure to sun and wind.
Product selection
It might be tempting to buy generic wood stains at your local home improvement store. But log homes require specialized stains that contain additives not usually found in common wood stains and sealants. It’s best to use products that are specifically designed for log homes, to give the best protection from sun, weather, and moisture.
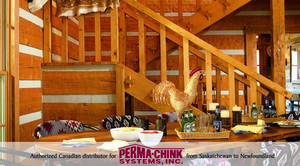
We specialize in the Perma-Chink line of stains and associated pre-and post-application products that form a complete system for all steps of successful log home re-finishing.
Tools
The following are the minimum equipment that will likely be required for your re-staining project:
- Ladders, scaffolding or similar equipment to reach all the wood areas of your home exterior. Follow all manufacturer directions for safety, because falls from height are a common cause of injury.
- High quality brushes suitable or stain. If doing a large area, you’ll want an airless sprayer to speed things up. Check the directions on your particular product, but generally an airless sprayer with 0.015 or 0.017 spray tip will work.
- One or more water buckets
- Clean rags
- Electric drill and mixer paddle (check directions as some products must be mixed by hand to avoid air bubbles)
Application Tips
Stains, stain primer, and clearcloat are usually best applied with an airless sprayer and then immediately back-brushed along the grain to achieve a uniform finish. i.e don’t spray your whole house and then start the back-brushing – spray a ten-foot section and back-brush it before going on to spray the next section. Consult the directions of your particular product for details.
Project Timing
Depending on the size of your home and your speed of work, re-staining is likely to take several days or more of work, plus additional days for curing time. The following is a typical project timeline:
- Stain removal – 1 day
- Restoring chips and gaps – 1 day
- Apply stain primer – 1 day to apply, followed by 72 hours to allow for curing
- Apply stain – 1 day to apply, then wait 24 hours to cure, which usually means two ‘sleeps’ before resuming work.
- Apply clearcoat – 1 day’s work to apply, 72 hours to cure
As for time of the year, it is most advisable to begin when it is not expected to rain heavily and the temperature is at least 10 degrees celsius during the day.
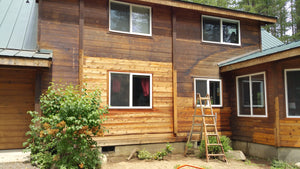
Preparation: Remove old stain
Surface prep is the most important part of a successful surface finishing project.
You cannot apply a new stain colour over an old one. The existing stain must be stripped down to the bare wood and then the new stain applied. The removal can be done mechanically or chemically.
If you wish to do a ‘refresh’ coat of stain for maintenance and will not be removing the existing stain, then simply clean the wood with a cloth or light brush, and mild soap or TSP (trisodium phosphate) and water.
Mechanical stain removal:
Blast with fine media such as crushed glass, or power sand with 50/100 grit or finer. 30/60 grit is too coarse. Do not use walnut shells as they can leave an oil residue that will interfere with staining.
Chemical stain removal:
Use a product such as StripIt, or S-100 according to the directions. They are each water-based stain & finish removers that are typically applied with an airless sprayer.
Restoring chips and missing sections of wood.
Areas of wood may have chipped or rotted away. These need to be repaired before re-staining.
E-Wood is a moldable, carvable, sandable putty that can be used to fill in missing sections of logs or dimensional lumber members on your log home. It will form a permanent bond to most rigid surfaces. Use E-wood to fill missing sections of logs, window frames, and other wood components of the home exterior.
When filling areas of wood that are porous, deteriorated, dried-out or spongy, you must first treat the area with M-Balm to consolidate the decayed area before applying E-Wood.
Priming the Wood for Stain
Sometimes applying a stain to bare wood can lead to over-absorption of stain in some areas, and under-absorption in other areas, causing a blotchy, streaky, or otherwise non-uniform colouring. This is more likely to occur when the wood surface has been media-blasted, and on wood surfaces that have especially rough surfaces such as rough-cut siding and old, weathered logs.
Using a stain primer such as Lifeline Prelude will fill the pores of the wood and provide a uniform surface for staining, to promote an even colour appearance.
Choose a Stain
We might use the terms “stain” and “finish” interchangeably. Our Perma-Chink Lifeline finishes are not like a traditional oil-based penetrating stain that impregnates the wood fibers with colourants. Instead they are film-forming water-based finishes that behave more like latex paints. For our purposes, we can call them stains since it fulfills the ‘stain’ step in the traditional wood-finishing process.
We carry the following lines of Perma-Chink exterior log home finish:
- Lifeline Exterior is a standard finish, applied in two coats.
- Lifeline Accents is similar to Lifeline exterior but comes in vibrant colours, often used for wood trim, selected walls,, fascia, millwork, timber, furniture and other wood elements that you want to stand out.
- Lifeline Ultra-2 is a highly-durable two-coat stain.
- Lifeline Ultra-7 is a highly-durable one-coat stain.
- Log & Timber Defense, is a semi-transparent finish that penetrates like oils, but without the negative effects of oil-based stains.
Choose a colour
There are many colour choices. Like paint, the stain starts as a colourless base that it tinted to the desired colour at the time of purchase.
Testing a stain sample is strongly recommended. The final appearance of the colour will depend on your wood species, how it’s prepared, and the sunlight in your area. We offer free samples shipped free within Canada, so you can apply the actual product to your actual wood and see it in person with the actual local sunlight, to help ensure you know what to expect from a whole-home restaining.
Apply the stain
Prepare and apply the stain according to the directions on the label.
Seal Exposed Log Ends
If you have exposed log ends, especially exposed to sun and the elements on a South or West side of the home, this exposed end-grain of the wood is especially vulnerable to checks (splitting) and moisture infiltrating the log like water traveling in a straw. This gives rot and decay an opportunity to start. If left unprotected, log or log corner replacement may eventually be required.
Log End Seal is a clear finish that helps to keep water from penetrating into the log ends and provides a durable layer of protection against sun, wind, and weather damage. To get the best appearance and color match, grind and sand log ends smooth, then apply the stain primer, then the stain, and then Log End Seal, before going onto the clearcoat.
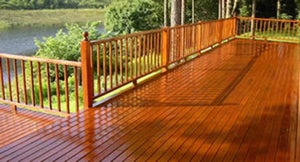
Apply a Clearcoat
A clearcoat or ‘top coat’ is a colourless layer that works similar to the clear-coat on a car’s paint, to protect the colour underneath.
The go-to product that is designed to serve as the clearcoat on the aforementioned stains is Perma-Chink Lifeline Advance.
Leave a comment